
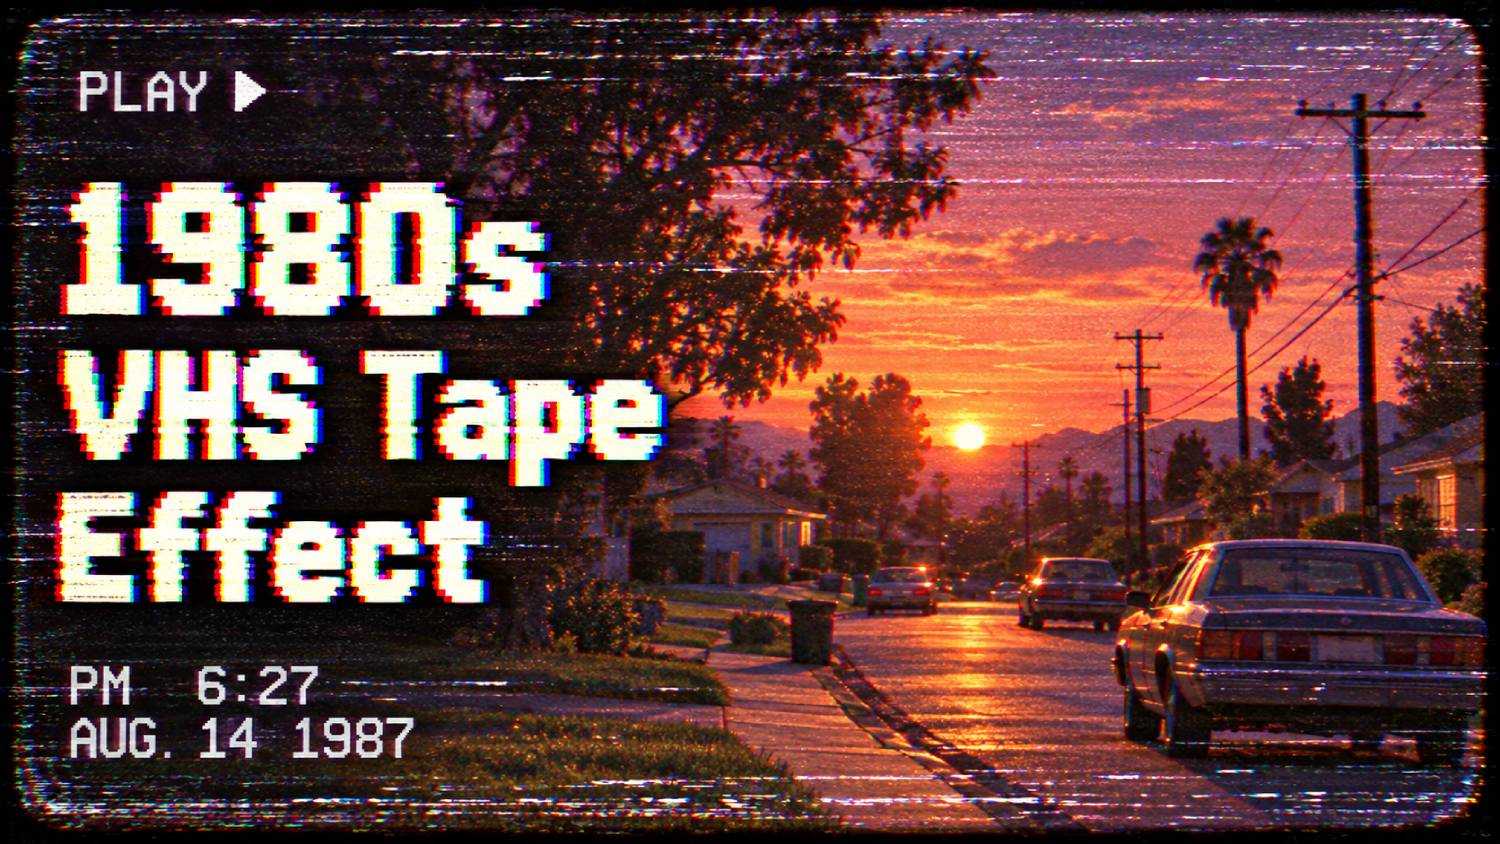
Wobbly colors, soft focus, rolling distortion lines and a blinking “PLAY” in the corner. The VHS look instantly transports viewers back to home videos, rented movies and late-night TV from the 1980s and ’90s.
Creators use the effect in music videos, social clips, brand content and short films because it adds nostalgia, texture and personality to otherwise ordinary footage. The good news is that you no longer need an old camcorder and a stack of tapes to achieve it.
This practical guide explains what makes footage look like VHS, how to shoot for a convincing result, which free and paid tools can help, how to build the effect step by step, and how to generate VHS-style clips with AI video tools.
What Makes Footage Look Like VHS?
VHS was an analog tape format with limited resolution and plenty of imperfections. Recreating it digitally means adding those flaws on purpose. The key ingredients are:
- Low resolution and softness: VHS footage looks blurry compared with modern video, with soft edges and little fine detail.
- Color bleed: Colors, especially reds, smear slightly beyond the edges of objects.
- Chromatic aberration: Red, green and blue channels drift slightly apart, creating colored fringes.
- Noise and grain: A fizzy, shifting static texture across the image.
- Tracking lines and distortion: Horizontal bands of interference, jitter and occasional rolling glitches, particularly at the bottom of the frame.
- Washed-out color and contrast: Blacks look slightly gray and colors are often oversaturated or shifted.
- The 4:3 frame: Old TVs used a squarer aspect ratio than today’s widescreen 16:9.
- On-screen graphics: Blocky date stamps, timecodes and “PLAY” or “REC” indicators.
- Audio character: Slight hiss, muffled highs and occasional warble.
The most convincing VHS edits combine several subtle effects rather than one heavy filter.
Shooting Tips for a Convincing VHS Look
The effect starts before you edit. Footage that already feels like a home video will look far more authentic once the filters go on.
- Shoot handheld. Slight shakes and casual framing feel like a real camcorder. Avoid perfectly smooth gimbal shots.
- Use on-camera lighting. Direct, flat light, like a camcorder’s built-in lamp or a phone flashlight, mimics the harsh look of old home videos.
- Zoom instead of moving. Old camcorders relied on clunky zooms. A few quick, imperfect zooms add authenticity.
- Frame for 4:3. Keep important action in the center so you can crop to a squarer frame later.
- Avoid shallow depth of field. VHS footage rarely had a blurry, cinematic background. Keep most of the scene in focus.
- Choose period-appropriate details. Retro clothing, props and locations help sell the illusion.
- Record clean audio. It is easier to make good audio sound old than to fix poor audio later.
Free and Paid Tools for VHS Effects
You can create a VHS look in almost any modern video editor. These options cover a range of budgets and skill levels. Features, pricing and availability change often, so check each tool’s current version before you commit.
| Tool | Cost | Platform | Best for |
|---|---|---|---|
| CapCut | Free version available | Mobile, desktop, web | Quick VHS filters and effects for social clips |
| DaVinci Resolve | Free version; paid Studio version | Desktop | Detailed manual control over color, blur, noise and distortion |
| Shotcut | Free, open source | Desktop | Building a VHS look from basic filters on a budget |
| Kdenlive | Free, open source | Desktop | Layered effects and keyframes at no cost |
| Adobe Premiere Pro | Paid subscription | Desktop | Professional editing with presets and third-party plugins |
| Adobe After Effects | Paid subscription | Desktop | Advanced glitches, tracking lines and on-screen graphics |
| Final Cut Pro | Paid, one-time purchase | Mac | Mac users who want plugins and fast editing |
| Third-party plugins and presets | Free to paid | Works inside major editors | One-click VHS looks with adjustable settings |
| AI video generators | Usually free tiers plus paid plans | Web and mobile | Creating new VHS-style clips from text or images |
If you are just starting out, try a free mobile filter first. If you want full control, learn the manual method in a free desktop editor such as DaVinci Resolve or Shotcut.
Step by Step: Building the VHS Effect Manually
These steps work in most editors, though menu names vary. Apply effects in roughly this order, and adjust each one gently.
- Set the frame. Create a 4:3 project or crop your footage to 4:3. For social platforms, you can place the 4:3 image inside a 16:9 or 9:16 frame with black bars.
- Lower the resolution. Scale the footage down and back up, or apply a light blur, so fine detail disappears. Aim for soft, not unrecognizable.
- Adjust color and contrast. Lift the blacks so they look slightly gray, reduce overall contrast, and push saturation a little higher. Shift the color balance slightly warm or toward magenta.
- Add color bleed and channel offset. Split or offset the red and blue channels by a few pixels, or use a chromatic aberration effect, to create colored fringes.
- Add noise. Apply animated noise or grain, then lower its opacity until it shimmers subtly.
- Add scan lines. Overlay thin horizontal lines at low opacity to mimic a CRT screen.
- Add tracking distortion. Use a wave, displacement or glitch effect on a thin horizontal band near the bottom of the frame. Keyframe occasional bigger glitches rather than constant distortion.
- Add jitter. Introduce tiny, random position shifts to imitate unstable tape playback.
- Add on-screen graphics. Place a blocky white or orange date stamp, timecode, or “PLAY” indicator in a corner using a simple monospaced or pixel-style font.
- Process the audio. Roll off some high frequencies, add faint hiss, and consider a very slight pitch wobble.
- Export and review. Watch the result at full screen and on a phone. If it is hard to watch, reduce the strength of the noise and distortion.
Once you like the look, save the effects as a preset or adjustment layer so you can apply them to future projects in seconds.
Quick Options: Apps, Presets and Plugins
If you need results fast, ready-made tools can apply a VHS look in a few taps or clicks.
- Mobile video apps: Many editing apps include VHS, retro or glitch filters. They are ideal for short-form social videos and quick experiments.
- Retro camera apps: Some apps let you record directly with a camcorder-style overlay, complete with date stamps and grain.
- Editing presets and LUTs: Color presets give your footage a faded VHS palette. Combine them with separate noise and distortion effects for a fuller look.
- Plugins for professional editors: Third-party plugins for editors such as Premiere Pro, After Effects, Final Cut Pro and DaVinci Resolve offer adjustable VHS effects with controls for tracking, noise and color bleed.
- Overlay footage: Stock VHS overlays, static and glitch clips can be placed on top of your footage using a blend mode.
Preset effects are quick, but they can look generic. Adjust the strength of each element to suit your footage, and avoid using the same filter on every video.
AI Video Prompts for VHS-Style Footage
AI video generators can create short VHS-style clips from text prompts, and some can restyle an uploaded image or video. Capabilities, clip lengths and usage limits vary widely between tools and change frequently, so check what your chosen tool supports.
The same structure works across most tools: scene + action + camera style + era details + VHS texture.
1. Home video birthday
A candid home video of a child’s birthday party in a 1980s living room, filmed on a handheld camcorder. Kids gather around a cake with candles, patterned wallpaper and balloons behind them. Shaky handheld camera, harsh on-camera light, soft VHS resolution, color bleed, tracking lines at the bottom of the frame, and an orange date stamp in the corner. 4:3 frame.
2. Retro product commercial
A 1980s-style TV commercial for [PRODUCT]. The product rotates slowly on a glossy pedestal with neon purple and cyan lighting and a grid background. Slow zoom in, slightly washed-out colors, VHS noise, scan lines and occasional tracking glitches. 4:3 frame. No real brand logos except [BRAND].
3. Summer road trip
Camcorder footage filmed from the passenger window of a car driving along a coastal highway at sunset in the 1980s. Palm trees pass by, warm golden light, handheld movement, soft focus, faded colors, light static and a “PLAY” indicator in the top corner. 4:3 frame.
4. Late-night TV intro
An original late-night TV show intro from the 1980s. Chrome 3D text reading “[SHOW NAME]” spins over a starry purple background with neon laser beams. Analog video look with color bleed, CRT scan lines and occasional signal interference.
5. Music video performance
A synth-pop band performs on a small stage filled with smoke and colored spotlights in a 1980s music video. Quick zooms, dramatic lighting, slight motion blur, VHS softness, chromatic aberration and rolling tracking distortion. Original performers, no real artists.
6. Restyle your own footage
Restyle the uploaded video to look like it was recorded on a 1980s VHS camcorder. Keep the people, movement and scene the same. Add soft low resolution, color bleed, analog noise, slight jitter, tracking lines at the bottom and a date stamp in the corner.
For best results, generate short clips and edit them together, then add consistent audio and graphics in your editor.
VHS Effect Mistakes to Avoid
- Overdoing the distortion. Constant heavy glitches make videos tiring to watch. Real tapes had occasional problems, not nonstop chaos.
- Keeping modern sharpness. Crisp 4K detail under a filter looks fake. Soften the footage first.
- Using widescreen cinematic shots. Shallow depth of field and smooth gimbal moves clash with the camcorder look.
- Forgetting the audio. Pristine modern sound can break the illusion. A little hiss and softened highs go a long way.
- Mismatched graphics. Sleek modern fonts for date stamps or titles feel out of place. Choose blocky, simple type.
- Ignoring accessibility. Heavy flicker and rapid flashing can be uncomfortable and may trigger photosensitive viewers. Keep flashes minimal and add a warning if needed.
- Making text unreadable. If your video includes captions or calls to action, keep them clear and sharp on top of the VHS effect.
Frequently Asked Questions
How do I make my video look like VHS for free?
Use a free editor such as DaVinci Resolve, Shotcut or Kdenlive to soften the footage, adjust colors, offset color channels, add noise and scan lines, and insert a date stamp. Free mobile apps also offer quick VHS filters.
What aspect ratio is VHS?
VHS footage was typically shown in a 4:3 aspect ratio on older televisions, which is squarer than today’s 16:9 widescreen format.
Can AI create VHS-style videos?
Yes. Many AI video generators can create short VHS-style clips from text prompts, and some can restyle existing images or videos. Results and limits vary by tool.
How do I add a VHS date stamp?
Add a text layer in a corner of the frame using a blocky, monospaced or pixel-style font in white or orange. Many VHS presets and apps include date stamp overlays.
Why does my VHS effect look fake?
The most common reasons are footage that is still too sharp, too much distortion, modern camera movement, and clean audio. Soften the image, use subtle effects and shoot in a casual, handheld style.
Final Thoughts
The VHS look is about embracing imperfection: softness, color bleed, noise, wobble and a few well-placed glitches. Start with footage that feels like a home video, layer subtle effects in a free or paid editor, or generate fresh clips with AI. Then save your settings so the look stays consistent across projects.
Great retro video can grab attention in seconds, but long-term growth depends on people being able to find your content and your brand. At Megrisoft, we help creators and businesses build visibility through SEO, video content strategy and AI search optimization. If you want your videos to reach more of the right viewers, get in touch with our team.
